How to Easily Grow a Vegetable Garden
If you’re growing your garden, and you want to know how long for vegetable seeds to sprout. This post is for you!
Spring is the time when we all start thinking about warmer days, freshening our spaces, and planning our gardens! This year, both of us at Cottage Living and Style are embarking on an at-home gardening journey. The idea of planning and planting a vegetable garden can be overwhelming. What seeds go with others? What soil do I use? When do I start them?
Today, we are taking the guesswork away and making your vegetable garden journey a foolproof success by breaking it down, step by step! Including a timeline for how long for vegetable seeds to sprout.
How Long for Vegetable Seeds to Sprout
In most cases, vegetable seeds take an average of 2-10 days to sprout.
Vegetables in the cabbage family will germinate in 1-2 days, like kale, broccoli, cauliflower, lettuce, and bok choi.
Onions, tomatoes, beets, squash, and chard seeds take 3 days to sprout.
While, celery, pepper, fennel, and eggplant take 5-10 days.
The Difference Between New vs Old Seeds
If you’re starting your gardening journey for the very first time, chances are you don’t have seeds on hand. You can get vegetable seeds from most major box retailers in the spring months, and a one-trip to your local garden center should be enough to get all the materials needed to get you started. But I did want to say, if you’re anything like me, then you might have been given a few old seeds here and there. But in most cases, it’s better to buy fresh seeds.
When you purchase a seed packet or new of your vegetable of choice, those little packets have a 90% germination rate. That means, 9 out of 10 seeds you plant, should grow! Older seeds only have a 5-year life span, so if they are older, I’d recommend you toss them!
Why Should You Start Seeds Indoors
As mentioned above, one trip to your local greenhouse or garden center can set your seed-starting journey up for success. Seed starting does not require as many tools and gadgets as you might think.
Starting your seeds indoors will ultimately give you a head start on the growing season, giving you a most plentiful harvest in the end. But it’s also necessary for many different vegetable types to be started indoors.
Warm-season vegetables, like tomatoes or peppers, can’t be planted outdoors too early in the season. Because of the cool temperatures outdoors that last week into the spring months, starting the seeds outdoors means the plants wouldn’t have enough growing days to reach their full potential. Which is why the soil temperature is also very important because most seeds like warm soil, not cold soil to start growing.
How to Start Germinating Seeds Indoors
Once you have chosen your vegetables, it’s time to wake them up for planting! Having the right conditions for this process is going to make or break your success. Also, did you know, that seeds have an “outer shell” that needs to be softened before they can start growing?
- Which is why, a lot of times you’ll see people using a damp paper towel. The trick is to lay your viable seeds inside the folded damp paper towel.
- Next, you’ll want to place that seed in the towel inside a Ziploc or similar plastic bag.
- Give them one more good spritz of water and place them in a warm location.

Note: Coffee filters can replace paper towels and generate the same results!
This process, which locks in moisture, mimics what happens inside a greenhouse. Paper towel germination is often the quickest way to start your seeds (seeds like peas will often sprout their tails overnight!). While the seed germination time will vary from one vegetable to the next, most seed varieties will come to life very quickly.

Note: Growing a garden indoors can be small space friendly, and fun to involve kids in the process. That way they can watch the seeds sprout before their eyes.
Which Seeds Start Best Indoors?
When it comes to the best seeds to start indoors, we thought we would give you a quick rundown of our personal favorites.
- Broccoli
- Brussel Sprouts
- Cabbage
- Tomatoes
- Cauliflower
- Celery
- Eggplant
- Peppers
Remember to see the timeline above to find out how long for vegetable seeds to start.
Which Seeds Should NOT be Started Indoors
Along with the seeds you should start indoors, this is a list of what NOT to start indoors. We know most seed packets will tell you where to grow them. But this quick and easy list will make your life easier.
- Cucumbers
- Pumpkins
- Squash
- Watermelon
- Carrots
- Turnips
- Beats
- Radishes
- Peas
Transplants vs Seeds
Fear not; if you’re starting plants from seeds, but it’s not something you have the time or capacity for, you can purchase “transplants” later in the season from your local garden center.
Transplants are plants that have been started by a nursery and can be planted later in the season. But they can also be finicky to grow at home because you never know how they were started.
So starting your seeds from home gives you a better chance because you’ll know how much water they like, how often, the daily amount of sunlight, temperature control, etc. Not to mention, transplants also don’t come in a multitude of varieties like seeds, so your selection will be limited to the most common vegetables. New seeds are also much less expensive.
When to Start Seeds
Starting seeds at the correct time is very important! Because starting them too early can lead to a variety of space issues indoors and for the plants in their starting pots. And starting them too late can mean plants may not develop as much as they should before going outdoors on their own.
So a general rule of thumb is that seeds should be started anywhere from 6-8 weeks before the last frost date (according to your growing area).
Your seed packet contains great information you definitely should pay attention to, including germination times, ideal temperature, and optimal conditions.
Everything You Need to Start a Garden
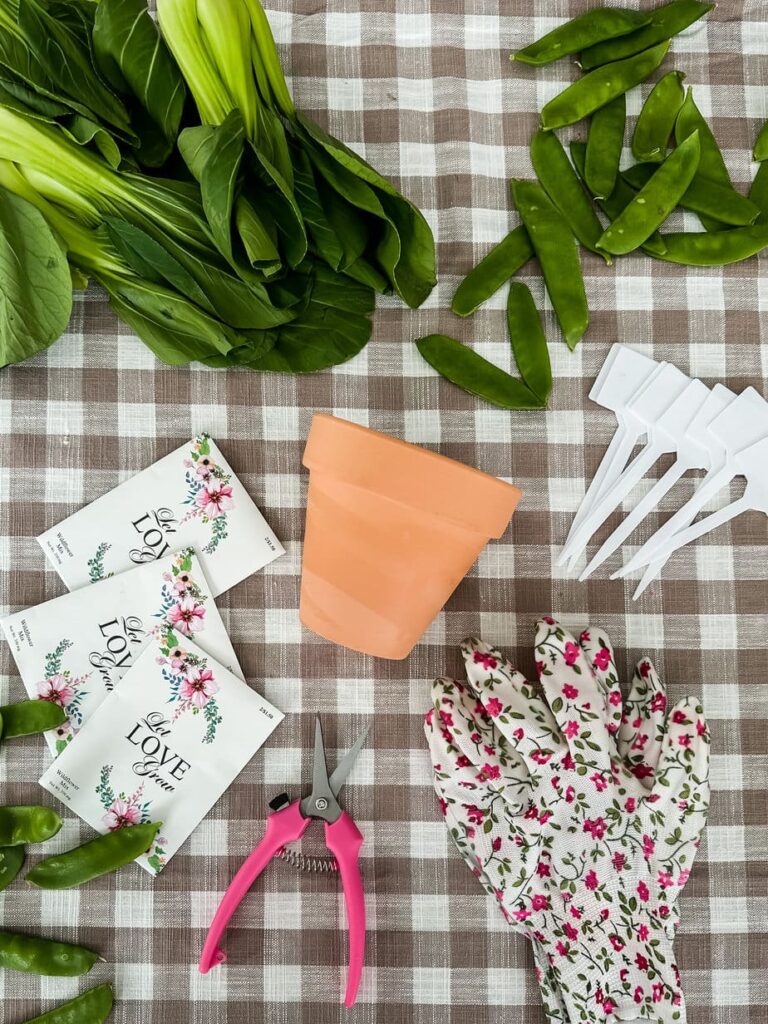
Growing your own garden from seeds is quite easy! Here are a few things we recommend having on hand.
Free Seed Trays
Free seed trays can also be used from leftover and cleaned-out yogurt cups, sour cream containers, egg cartons, or plastic muffin trays. Keep in mind that seedlings starting in smaller containers will usually need to be transferred into a larger pot about halfway through the 6 week’s germination period.
5 Steps to Starting Seeds Using Trays
If using plug trays to start, your soil should reach the top of the tray.
- You then want to gently push the soil down and fill a second time to ensure there is enough settled soil in the trays. If using a pot or larger vessel, fill to the brim with your soil and press down. Seeds like lots of soil to get started!
- Going back to that vital information on the back of your seed packet, it should tell you how deep to plant the seed inside the container. You can use your finger or the eraser end of a pencil to create an indent into the soil at the desired level of deepness.
- Inside the seed packet, you will have multiple seeds to choose from. Choosing the healthiest-looking seeds (the larger the better) will usually result in a higher germination rate. Some strains of vegetables like lettuce, onions, beets, and peas should have 2-3 small seeds placed inside each hole (a seed cluster).
- Now cover the seeds with more potting mix until the soil reaches the top of the container, once again.
- Labeling your seeds is so important! As you move them around throughout the process, it’s so easy to get confused as to what you planted. For best results, write on the bottom of the trays or use a popsicle stick with the seed type inserted into the trays as a label.
- The amount of water you give your seedlings is also very important. Be sure not to overwater as this can affect the viability of the seeds you are trying to grow. In the beginning, use a spray bottle to mist the seed soil to keep it damp but not wet.
Room Temperature vs Soil Temperature
Your room temperature and soil temperature play a huge role in the germination process. I also know how impatient you’re going to be as you watch your seeds come to life. But trust me, mimicking outdoor and naturally perfect plant conditions is the goal.
In most cases, this means warmth. But at the same time, air temperature is actually less important than soil temperature.
Did you know that some potting mixes contain fertilizer that can burn or cook your seedlings? Even though it’s still best to start your seeds with a basic potting mix. And don’t forget to take a look at the seed packet, because it will give you all this essential information for the success of your garden.

Note: Placing your seed trays in a south-facing window or placing your seed tray on top of the refrigerator should give it sufficient heat to germinate effectively.
We know because of the chart above, (how long for vegetable seeds to sprout) that some plants take longer to start growing than others. So we’re sharing more secrets to help speed up the germination process below.
How to Speed up the Germination Process
If you want to speed up the process because you started the process a tad bit late, you can use a heating pad or heat mat to warm the soil under the trays.
Be VERY cautious if using this method because you do not want to burn your seeds. Keeping your seeds moist is essential to their success. The ideal soil moisture can be achieved by covering the tray or pot with a cover, which will act as a humidity dome. A plastic bag can easily be used to create the same ideal conditions for your seeds. Once your seedlings have begun to sprout, you will then want to forgo the cover for the rest of the germination period.
Using a Grow Light
I didn’t want to leave out anyone who lives in a small or darker place. So I’m sharing our favorite/go-to grow lights.
When starting seeds, you can also use a simple grow light if placing your seeds in various spots around your house is not an ideal situation. You will want to keep the lights on for about 16 hours a day in the beginning.
How to Transplant Successfully
Once your seedlings have grown to their ideal size (this is usually when two leaves appear on the plant) and the weather outside is perfect, it’s time to start thinking about transferring your seeds to their forever home. Seedlings of tender crops need to go through a phase called “Hardening Off” which gradually introduces them to real-world conditions. For most plants, this process begins 7-10 days before the final frost time in your area. Placing the seedlings outside for a bit of time each day, and gradually lengthening the time will ease them into the new conditions.
Important Information to Remember
- Experienced gardeners know that not all of their crops are going to grow. Outside factors such as temperature, animal and pest control, rain and humidity, etc., all play a critical role in your garden’s success.
- Extra seeds can be stored for the following year but are best used within two. Out-of-date seeds have lower germination percentages.
- Quick-growing seeds like lettuce and radish can be started using this entire process several times throughout the season, giving you fresh produce well into late summer.
- Mimicking the seed’s natural environment is the best strategy for seed success.
- Different vegetables need different planting depths, moisture levels, and start times. The back of the seed packet will be your best friend.
Now that you know how to grow a vegetable garden, and how long for vegetable seeds to sprout, we can’t wait to see your garden come to life! Send us your garden progress so we can share in the excitement along with you!


