Bar Sink Ideas + How to Install One in 8 Easy Steps
Post Summary: If you’ve ever thought about adding a bar sink to your home, we’ve got you covered with 9+ bar sink ideas for every budget. Plus we’ll even show you how to install one in 8 simple steps!
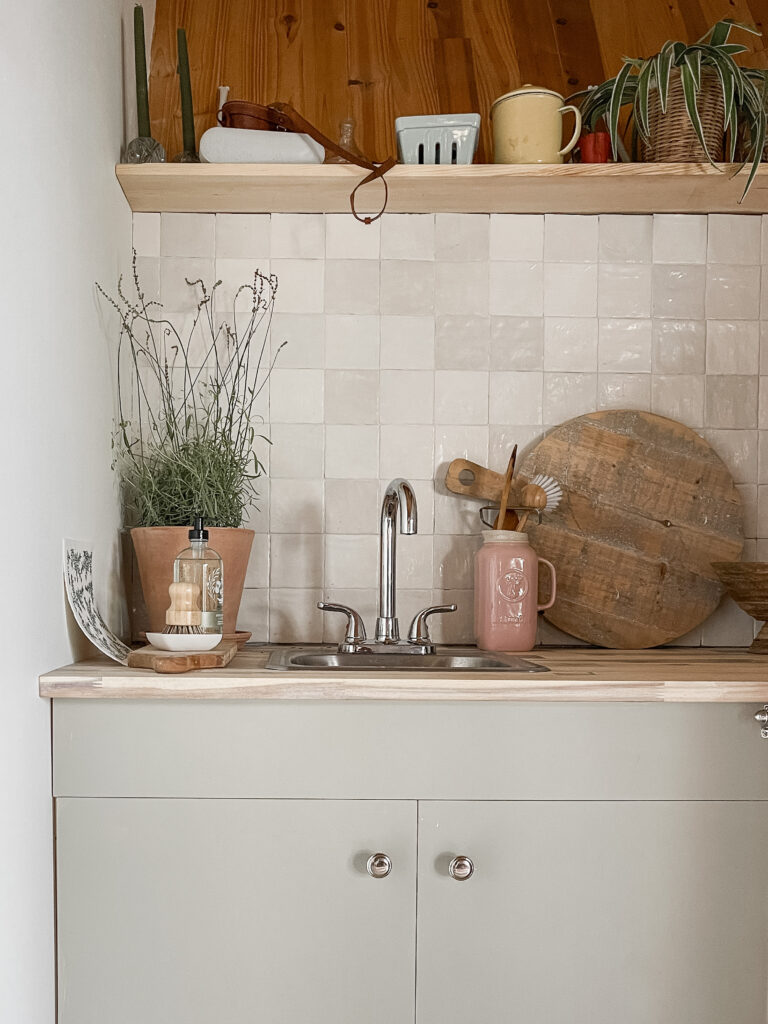
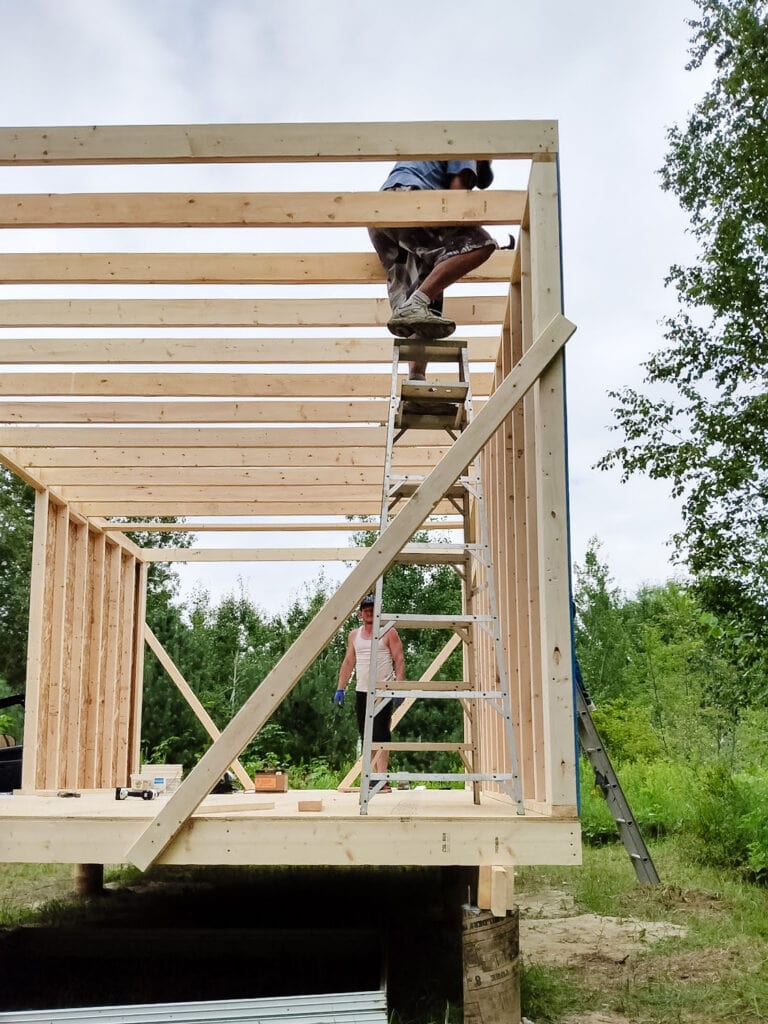
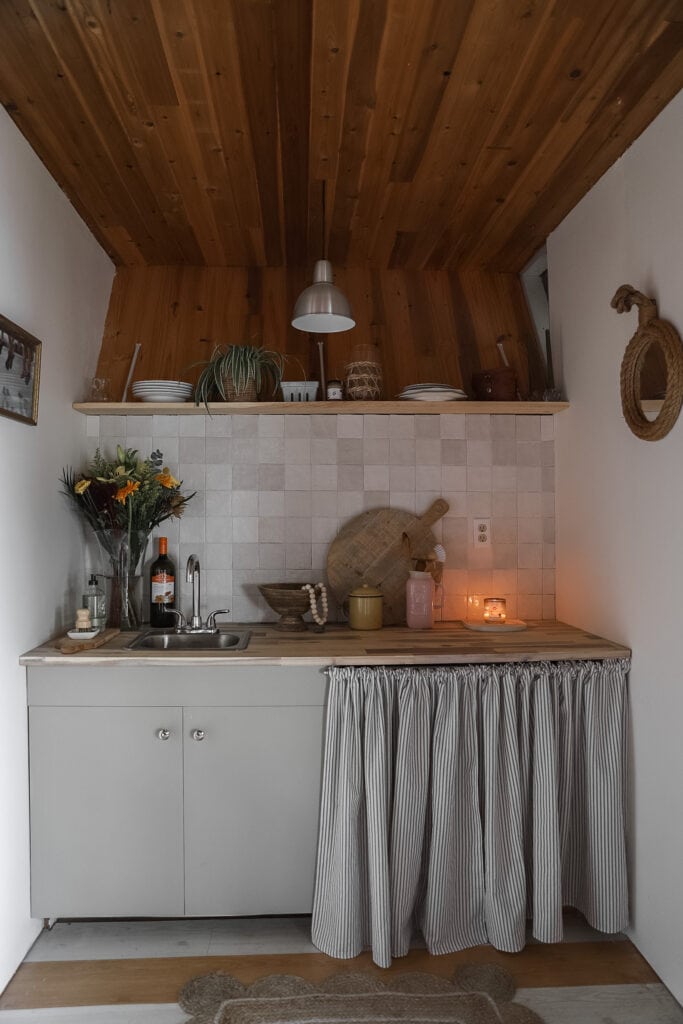
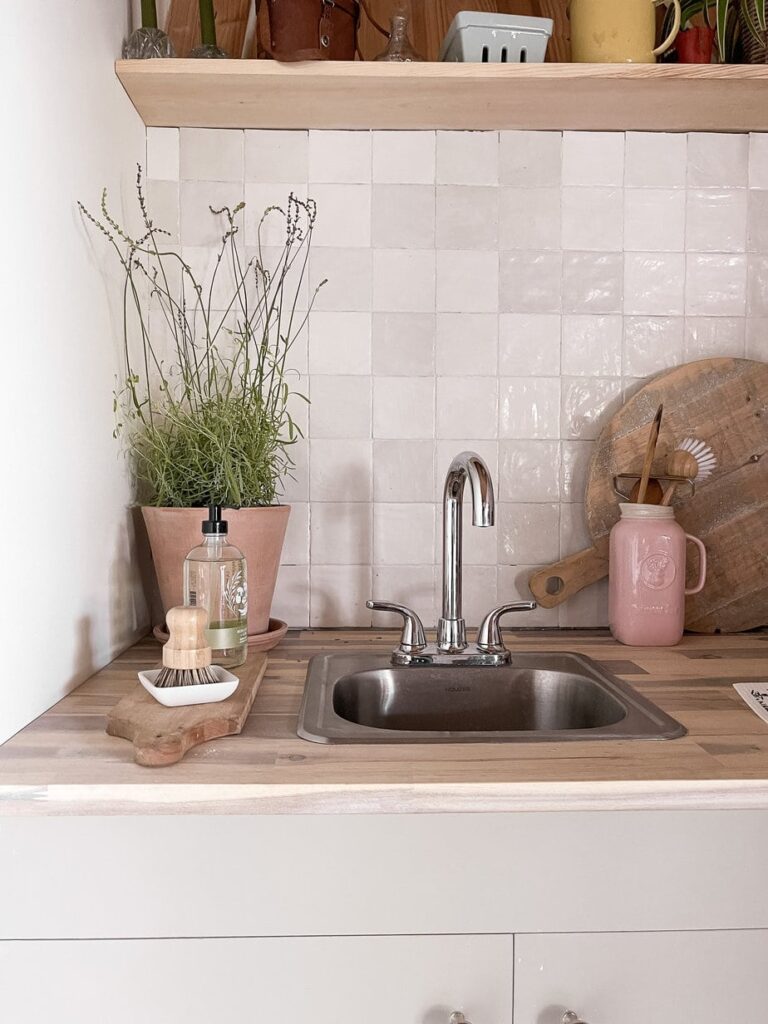
We’ve been slowly renovating our tiny island cabin, and the kitchen has been on our list for a while. It was a small kitchen that we knew had to have special small space design considerations, like substituting a bar sink as our kitchen sink. So after doing a ton of research, this is what we found and I’m sharing the sink we bought from Amazon as well.
Adding a bar sink into your space offers so many benefits. This simple DIY project is sure to be the top conversation piece at your next gathering, and we guarantee you will ask yourself why you didn’t install one sooner.
We’ve done the hard work for you of putting together all the information you’ll need to successfully complete this DIY at home, so sit back, grab a glass of vino (soon to be enjoyed from your new wet bar!), and let the renovation dreaming begin!
Bar Sink Ideas
Bar sinks, also called prep sinks, island sinks, and entertainment sinks are a great addition to any kitchen space, even in smaller living areas.
Wet bars, while originally for mixing drinks and entertaining, now have many other modern benefits.
These small space additions are a convenient way to meal prep, get water, wash hands, or quickly rinse mixing bowls and kitchen gadgets while cooking or baking, especially in busy kitchens.
Bar sinks, because of their size can be strategically placed in small spaces that are underutilized within your home. They are also very versatile! The overall look and feel of your kitchen will be improved and did we mention an increased resale value of your home from this simple installation?
While today’s DIY is focused on adding a wet bar, we do want to clarify the difference between a wet bar and a dry bar as there are a lot of misconceptions out there. A dry bar sink requires no running water or plumbing components but still requires the same cutting process. While less convenient without water, dry bars require no previous plumbing components and can sometimes be the ideal option for basements and outdoor entertaining areas when a water supply is not available.
The great thing about adding a wet bar into your space is that generally, the plumbing connections needed already exist nearby. This makes it far easier to hook everything up. If you are looking to add a wet bar into a new location or build, it’s important to ensure you have the time and budget available for the project.
9 Bar Sink Ideas for your Home or Cottage
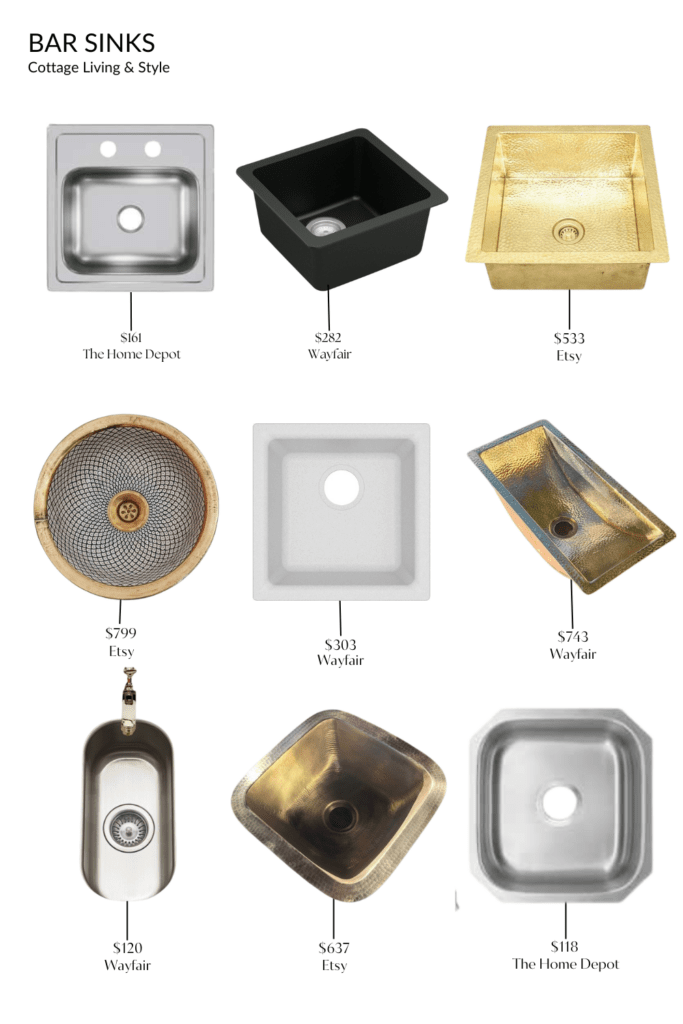
6 Long Gold Bar Sink | 7 Long Bar Sink from Wayfair | 8 Brass Sink from Etsy | 9 Stainless Steel from The Home Depot
How to Choose the Best Sink?
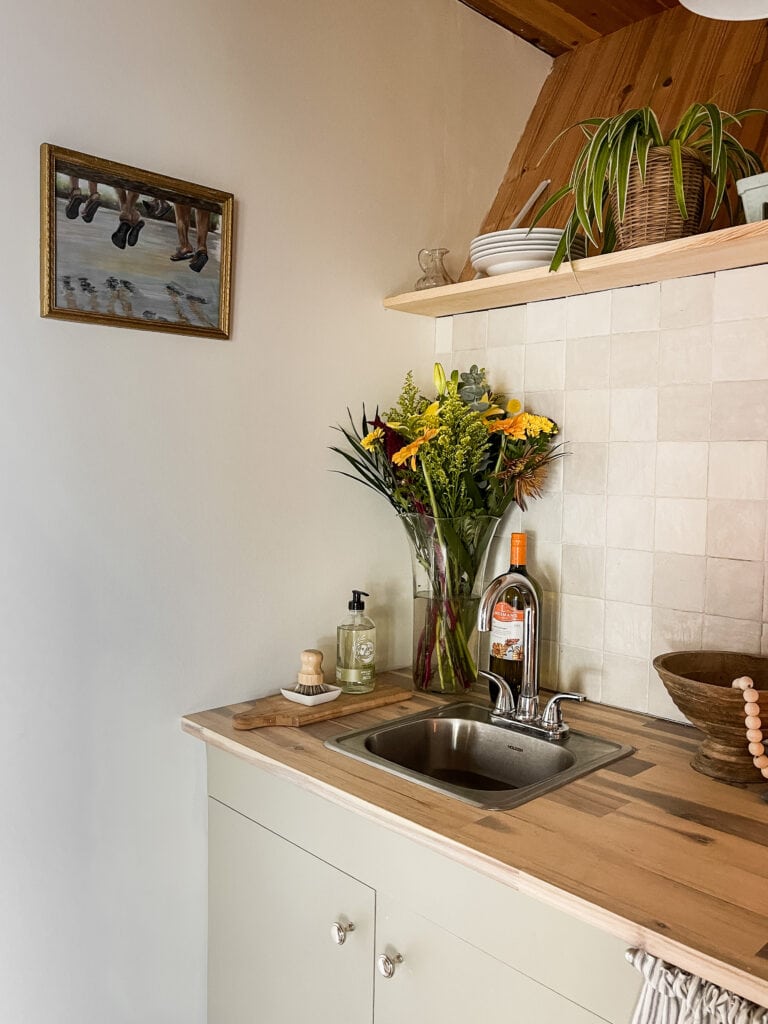
Bar sinks are generally 12-18 inches square and are usually decorative in nature, featuring copper, pewter, bronze, or stainless steel. Bar sinks or wet bars are designed to be discrete, even easily hidden under a cutting board. When choosing the right bowl and faucet materials for your project, we recommend coordinating them with the style of other fixtures in the room to ensure a cohesive design for the entire space.
Let’s talk Installation
Two common methods exist in terms of installing a wet bar. One common method is the drop-in method and the other is the undermount.
Using a drop-in style sink means the rim of your sink will rest on your countertop space. The most difficult part of this installation is cutting the hole, but most sink manufacturers usually provide a cutting template to take the guesswork out.
Note: The undermount sink is a type of installation that is suspended from underneath your countertop or workspace. This form of installation is more of a challenge and can sometimes require professional installation.
Replacing an existing wet bar sink with a more modern one? Be sure to purchase a sink that is the same size for an even simpler update!
How to Install a Bar Sink
For our most recent installation, we used the drop-in method with an existing plumbing location nearby.
So, are you ready to install your sink with us? This is an easy afternoon project once you have the tools and supplies needed!
Tools you’ll need
Here’s a list of all the materials and tools you’ll need to install your new bar sink!
Step 1
Make sure your workspace is clean and you have the necessary tools for the job. See our notes above and the materials needed.
Step 2
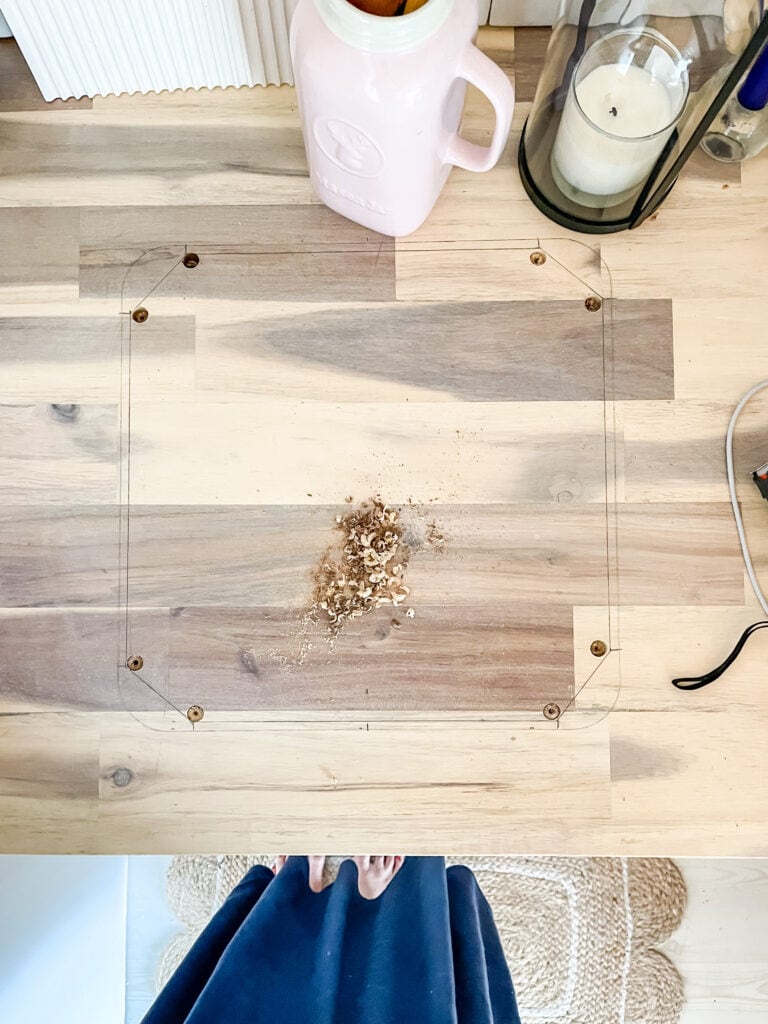
Lay out the design template provided with the sink. Most come with these, but if yours doesn’t, you can measure the dimensions of the outer rim of the sink onto a piece of cardboard to make a template. The old as-time rule of measure twice, cut once applies here 😊
Step 3
Mark the counter with your measurements. We recommend decreasing the size slightly by ½ inch on all sides to ensure your sink does not slip through the hole if you are using your own hand-drawn and measured template. You can always make the cut bigger, but you can’t make it smaller. A template has already factored this in for you.
Step 4
Cut the hole! A curved line for a project like this is easier to cut with a jigsaw. Go slow. You want to ensure you are cutting directly on the line. Don’t be afraid to stop mid-cut and get control or a better angle.
Step 5
Lower your sink into the hole you just cut to see how it fits.
Step 6
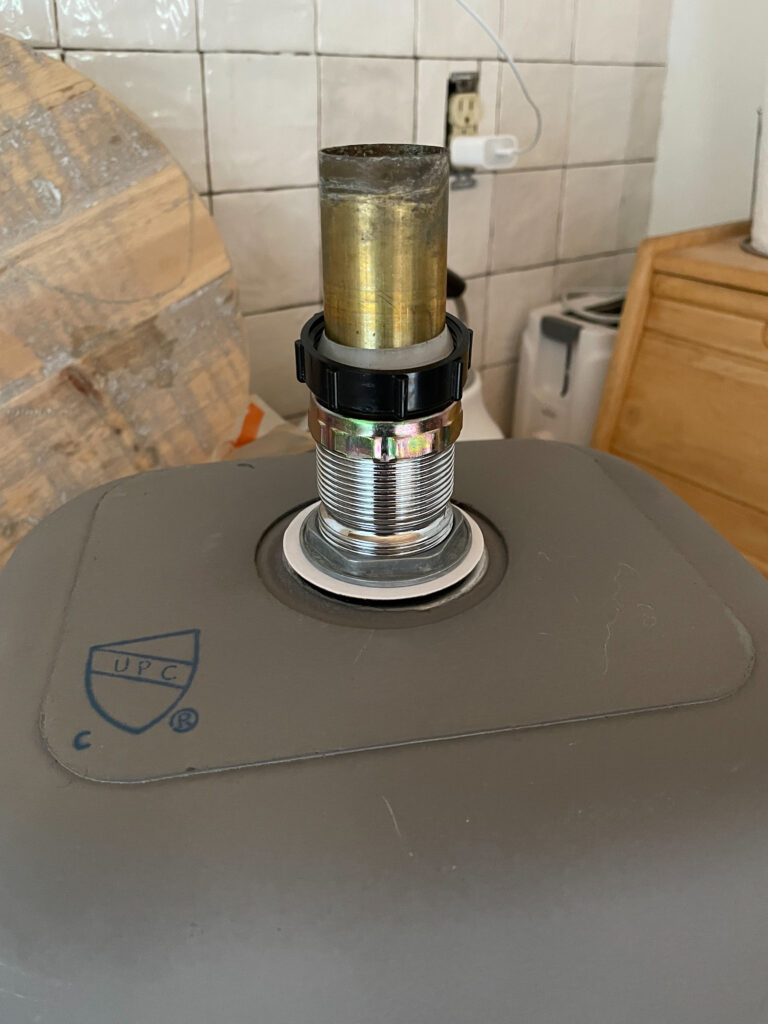
If your sink fit perfectly when you lowered it in, our focus is now going to shift to installing the drain flange. The drain flange is the visible drain portion of the sink. It’s the part of the drain that creates that perfectly tight seal. Plumbers putty will be used to seal the drain flange into place inside the hole at the bottom of your sink.
Step 7
Install the gaskets that come in the sink kit over your existing drain stem. Be sure to follow the instructions provided by the manufacturer to ensure a perfect installation.
Step 8
Install the sink! To ensure a perfect fit and seal, use the caulking sealant and place a continuous line around the edge of the open hole. Lower the sink in and align as necessary for a perfect fit. Once your sink is in its perfect place, you can wipe away any access and sit back at a job well done.
We hope you love your new space as much as we love ours! We guarantee you will be using this space more than you ever imagined. Be sure to tag us on social so we can see your new or updated bar sinks!