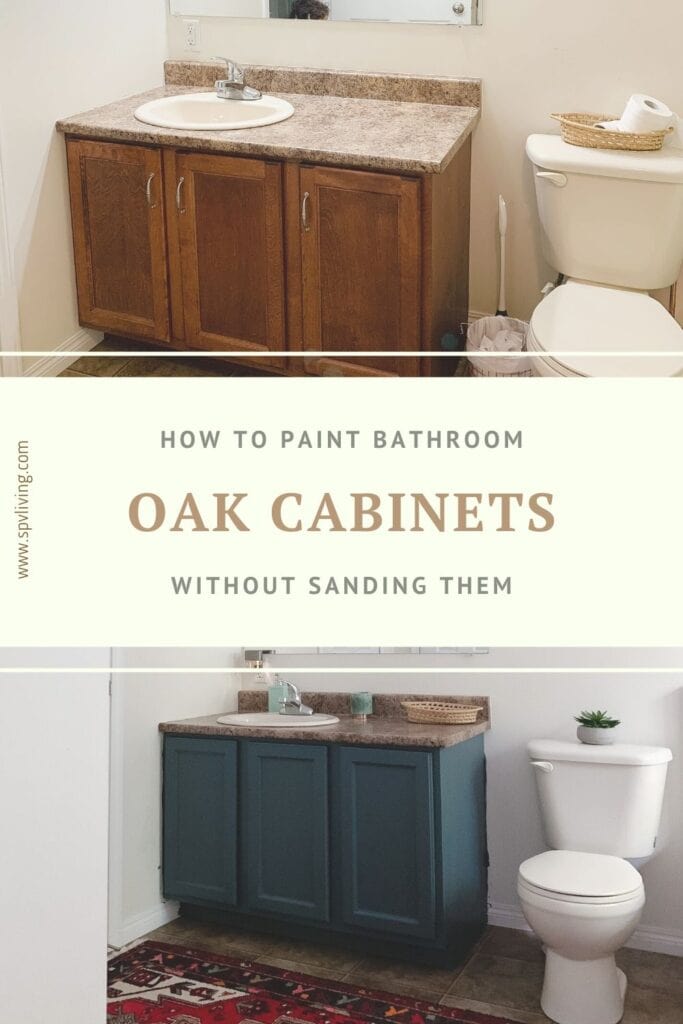
7 Easy Steps to Paint Bathroom Cabinets without Sanding!
Post Summary: In this article, we’re sharing exactly how to paint bathroom cabinets without sanding them.
I remember when we bought this house, after selling our condo in the city. I knew buying it would mean we’d have to do a few renovations ourselves. But of course, I assumed it would happen right away, instead, we’re making slow progress over here.
Another reason I’m sharing this simple home improvement is to give hope to people like me who hate the way our house currently looks.
I hope that sharing these simple updates will help you see the beauty in your home, and maybe even fall in love with the home you are in right now.
Anyway, keep reading to find out how to paint a cabinet without sanding it.
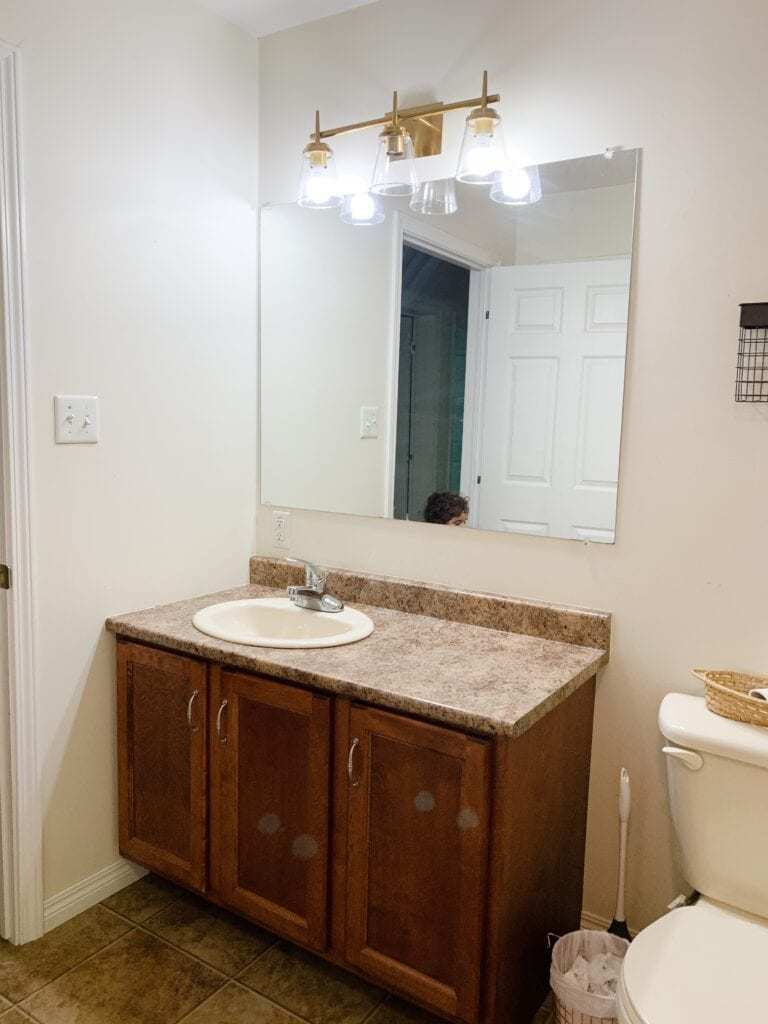
This was how our bathroom looked when we bought our house. The red oak cabinets needed to be updated, and we planned to remove the laminate countertops and replace them with quartz.
How to Paint Bathroom Cabinets without Sanding Them
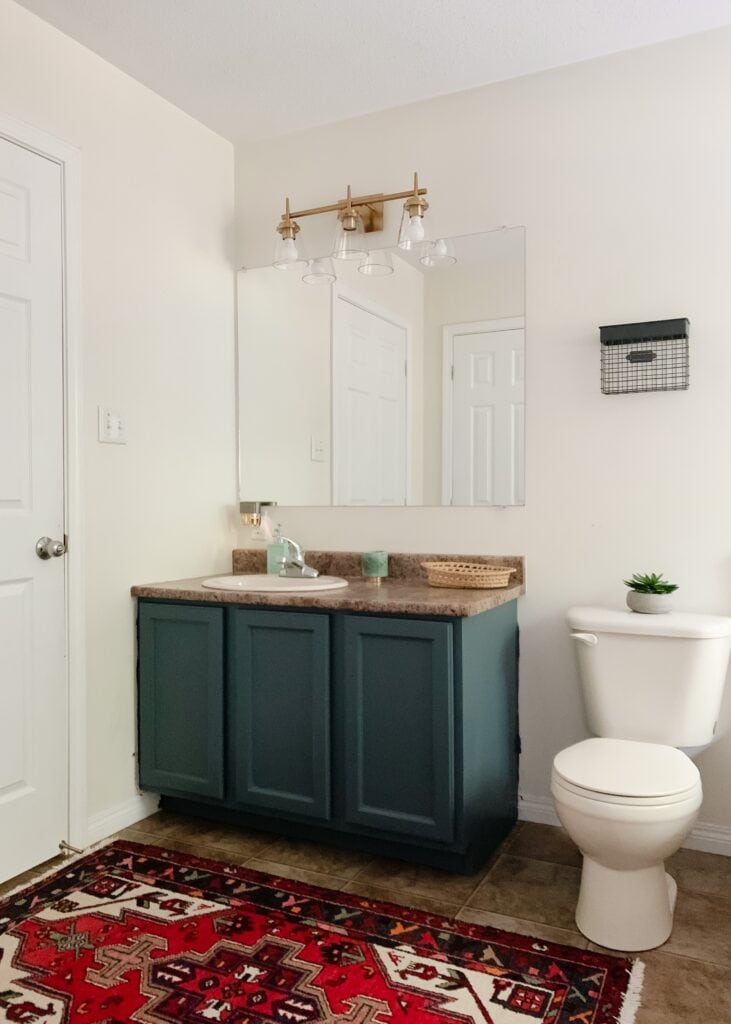
We originally planned on ripping out the old vanity and replacing the entire thing but since we’re taking our time with the remodel I wanted to give the space a little makeover.
I had seen several of painted vanities, and I’m not going to lie, it looked like a lot of work. Every one of the DIYs I saw took the doors and drawers off the hinges and brought them to a work area to sand. The sanding was the part I loathed the most, especially since 90% of those DIYers said that was the hardest part.
I knew there had to be an easier way.
Since we’re planning a remodel anyway, I felt comfortable testing out my idea on our vanity. I figured if it went wrong I could just deal with it until it was time to change it out.
But as you’ll see below, it turned out pretty amazing! So much so that I recreated the same DIY on our kitchen cabinets.
You also might be wondering how the painted cabinets hold up. and the truth is they still look as good as they did when I first painted.
What is the Best Paint for Cabinets and More Durable?
Before we start painting let’s chat about the type of paint you’ll need. We also highly recommend the following three paint products that are premium and specific for painting cabinets (and trim).
BACKDROP Premium Paint for Cabinets and Trim
Rust-Oleum Transformations Basics for Cabinet and Trim
Heirloom Traditions All in One Paint for Cabinets and Trim
What are the basic sheens (from the most durable to least durable)?
- High Gloss
- Gloss
- Semi-Gloss
- Satin
- Eggshell
- Matte
- Flat
The paint finishes are most durable and suitable for high-traffic areas
What are the advantages and disadvantages of choosing different sheens, such as high gloss, semi-gloss, satin, etc.?
The advantages of choosing a high gloss finish are its high durability, easy cleaning, and the ability to create a high-end or modern look. However, a high gloss finish tends to show fingerprints and smudges more prominently. Semi-gloss finishes offer good durability and easy cleaning while being less prone to showing smudges. Satin finishes provide a balance between durability and a subtle sheen, making them suitable for high-traffic areas.
What is the recommended sheen for a high-traffic area like a bathroom vanity?
For a high-traffic area like a bathroom vanity, it is recommended to use a satin finish. However, the first choice would be a semi-gloss finish due to its wipeable nature for easy cleaning.
Tools you’ll need
To paint a cabinet without sanding first, you’ll need a few items.
RECOMMENDED TOOLS


Click the items above to shop directly from Amazon.
Step-by-Step Guide to Painting a Cabinet without Sanding
1. Prepare your workspace
Remove items from your cabinets and clear countertops. Take a damp cloth and wipe everything down. Make sure there is no dust or dirt on anything you plan on painting. You can also put down a drop cloth to protect the floors.
2. Remove the hardware and doors
Using a screwdriver or drill remove the door handles, pulls, and knobs from the cabinet doors and drawers. You might want to save these to use again or if you’re on a really tight budget try spray painting them! Remember to label or mark everything so reassembling is easier.
Take off the cabinet doors by gently unscrewing them from the cabinet frame.
3. Clean and tape around the cabinets
Tape around the floors, walls, doors, and drawer fronts.
I also taped on the inside of the cabinets since I was leaving the inside white. Also, I did use wood filler in some areas that needed it.
Wearing gloves, and protective gear. Mix the degreasing cleaner as the instructions tell you to. Wipe down all the cabinet surfaces thoroughly. Oak tends to have a grainy texture, so make sure you get into all the crevices. Allowing the cabinets to dry completely.
4. Apply Priming
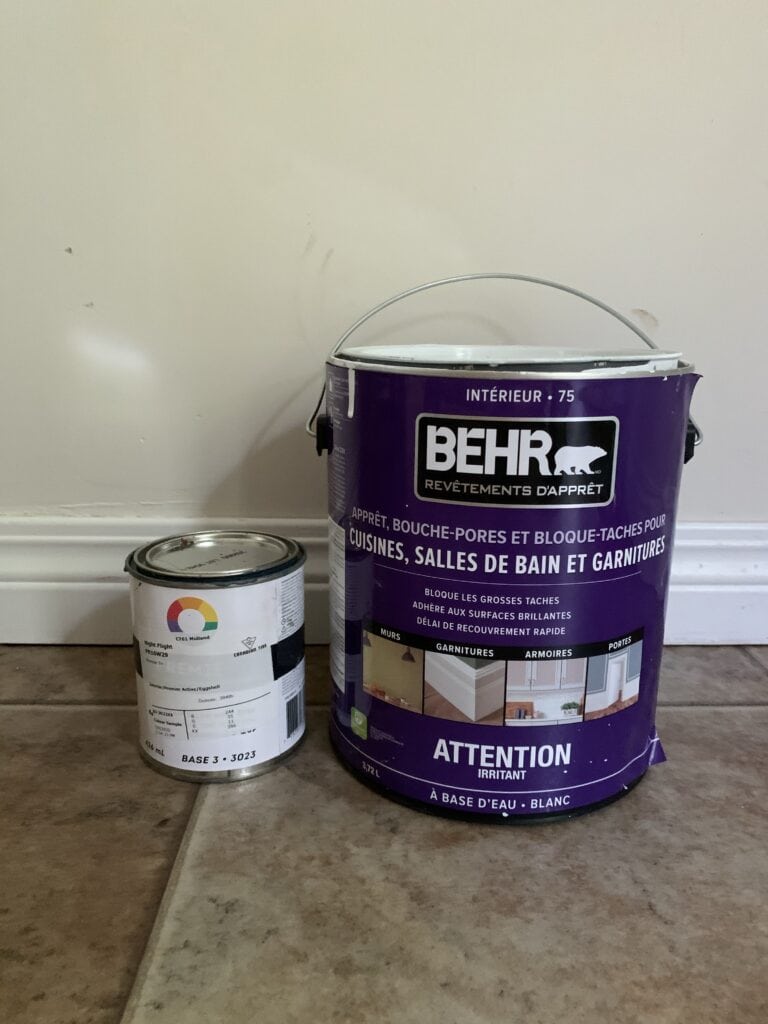
Start with a good primer like Behr’s Kitchen, Bath, and Trim since it is very good acrylic paint. We know it can handle coverage over wood, glossy surfaces, and even oil-based paints.
Apply a thin, even coat of primer using a brush or foam roller. Make sure to cover grain and corners. I used 2 coats to cover the oil-based paint but you can add another coat if the cabinets had high-gloss paint. I could have gotten away with even one coat of paint because the coverage was amazing.
5. Paint the Cabinets
I waited at least a few hours before the painting so that the primer would have enough time to dry. I wanted to make sure we did a really good job with the primer since that’s the key to this whole project.
Once the primer is dry, begin painting your cabinets with the paint of your choice. Use a brush for detailed areas and a foam roller for larger, flat surfaces.
Apply in thin, even coats. Avoid the urge to apply a thick coat; it’s better to apply multiple thin coats for a smoother finish.
Let each coat dry before applying the next. Depending on your paint, you may need 2-3 coats for full coverage.
I HIGHLY recommend Behr’s Chalk Paint. I just used it on this Black Fireplace Makeover which you can check out as well.
6. Reassemble
Wait for the paint to dry completely before putting everything back in place. I waited overnight, and I was so happy with how it looked!
7. Optional Sealing and Top Coat
I will note that if you choose to use Behr’s Chalk Paint for your cabinets, you will need to include an extra step. Since it is chalk paint you will have to use wax on top of the paint. But the outcome is beautiful and will hold up for years!
If you want additional protection for your newly painted cabinets, apply a clear sealer. This step will help your cabinets be more durable, especially for places like kitchens where moisture, grease, and other factors can affect the longevity of your paint job.
Why is primer the most important part of painting honey oak cabinets?
To avoid sanding the glossy honey-toned vanity you need to get a good primer. After asking a few other home DIYer friends, I found that the best primer was actually Behr’s Kitchen, Bath, and Trim stain-blocking primer and sealer.
Not only does the acrylic paint stick to the gloss but it covers the oak color in just one coat. Plus its quick drying time is perfect for painting the vanity in just one day.
How long should I wait for the primer to dry before painting?
It is advisable to wait at least a few hours for the primer to dry before painting. Allowing sufficient drying time ensures that the primer has properly adhered to the surface and will result in a better overall finish for your bathroom cabinets.
How many coats of primer should I apply?
The number of coats of primer needed may vary depending on the condition of the cabinets and the type of paint used previously. Generally, it is recommended to apply at least two coats of primer, especially if the cabinets have glossy surfaces or were previously painted with oil-based paints.
Can I achieve a professional finish without priming?
It is less likely to achieve a professional finish without priming. Priming helps create a smooth and even surface for the paint to adhere to, resulting in a more professional-looking outcome.
What happens if I skip priming?
Skipping priming may result in a less professional and less durable finish for your bathroom cabinet makeover. It is recommended to prime before painting for the best results.
Why is priming important before painting bathroom cabinets?
Priming is essential to producing a professional and durable finish for your bathroom cabinet makeover.
It also has a smooth finish, without the need to lightly sand.
Do you recommend a high-quality sprayer for a high-quality finish?
Yes, I can help with that. When it comes to achieving a high-quality finish for your DIY projects, using a sprayer can be quite effective. However, it’s important to note that mastering the technique of spraying can be a bit tricky. There are various factors to consider, such as the type of sprayer you use and the appropriate spraying technique. If you’re looking for recommendations, I suggest considering the Wooster short handle brush.
It’s a brush that Sarah has mentioned in her article, and it can provide a smooth look when used with the right technique. However, it is worth noting that using a sprayer typically offers the smoothest finish. To make the most out of a sprayer, it’s crucial to ensure proper technique and practice beforehand. It’s also helpful to follow any manufacturer instructions and guidelines specific to your sprayer model. By doing so, you’ll have a better chance of achieving the desired high-quality finish on your DIY project. Good luck with your project!
What should the cabinets be resting on when painting?
When painting cabinets, it is important to ensure they are resting on a suitable surface to achieve the best results. One commonly used method is to spray paint the cabinets, as it often provides a smooth finish when done correctly. However, mastering the technique of spray painting can be challenging. Alternatively, using a high-quality brush, such as the Wooster short handle brush mentioned in my article, can also be effective. Ultimately, the choice depends on your preferred method and skill level. Whatever you choose, make sure the cabinets are properly supported on a stable surface to facilitate even and precise painting. Good luck with your project!
Did you paint the counters and what is the process?
I did not paint my counters, only because I am going to replace our laminate counters with quartz. I found that you can save almost 50% of the cost of a new vanity, if you replace just the countertops. We had a great experience! I paid around $300 Canadian to replace ours, and it was dependent on the material, and size of course.
If you’re looking for a great tutorial on how to paint your countertops, I highly recommend watching the video below.
What sheen/finish should my sealer be if I chose a satin paint finish?
If you have chosen a satin paint finish for your project, it is crucial to ensure that your sealer matches the same sheen/finish. By selecting a satin sealer, you maintain consistency and prevent any alteration in the final appearance of your surface.
It is important to remember that using a different sheen/finish for your sealer can potentially change the overall finish of your topcoat. Therefore, to achieve the desired satin finish for your project, make sure to select a satin sealer as well.
Should I seal my painted bathroom cabinets?
Sealing painted bathroom cabinets is a topic that often sparks debate among DIY enthusiasts. Some argue that it is unnecessary if you use high-quality paint, while others believe that sealing is crucial for achieving a durable finish. The decision on whether to seal your painted cabinets ultimately depends on various factors unique to your situation.
One factor to consider is the type of paint you have chosen. Lower-quality paints may benefit from the added protection of a sealer, as they tend to be more prone to wear and tear over time. On the other hand, if you have invested in high-quality paint with built-in durability, you might not necessarily need to seal your cabinets.
Another aspect to take into account is the level of traffic your bathroom typically experiences. High-traffic rooms, such as bathrooms used by multiple family members or guests, are more likely to endure daily wear and tear. In such cases, applying a sealer can provide an extra layer of protection, ensuring that your cabinets withstand the test of time.
Ultimately, it is essential to use your best judgment when deciding whether or not to seal your painted bathroom cabinets. If you opt not to seal and find that your cabinets show signs of damage in the future, you can always repair any chips or imperfections and then apply a sealer to restore their durability.
It is worth noting that some sealers have the potential to yellow over time. This is particularly important to consider if you have chosen to paint your cabinets white, as any yellowing can significantly alter the appearance. When selecting a sealer, ensure that it matches the sheen or finish of your paint choice. For example, if you have used a satin paint finish, it is recommended to choose a sealer with a satin finish as well. This will help maintain the consistent appearance of your cabinets without any unexpected changes in the finish.
What should I use to clean my bathroom cabinets before painting?
To ensure a solid foundation for your paint, it is recommended to use a heavy-duty degreasing cleaner like TSP (trisodium phosphate) to thoroughly clean your bathroom cabinets. TSP effectively removes any hidden film, grime, and dirt, providing a clean surface for the paint to adhere to. By using TSP, you can ensure that your cabinets are properly prepared for the painting process.
How can I ensure that my new cabinet hardware will fit into the existing holes?
How to Install New Cabinet Hardware into Existing Holes?
Can you paint over previously painted bathroom cabinets?
Yes, you can paint over previously painted bathroom cabinets. However, it is important to determine the type of paint that was used before proceeding. If the cabinets were previously painted with oil-based paint, using latex paint directly on top without priming may not allow them to adhere properly. To ensure proper adhesion, it is recommended to use a high bonding primer before applying the new paint. This is the case regardless of whether the cabinets were previously painted or not, as it helps the new paint bond securely to the surface. If you are unsure about the type of paint used, it is best to err on the side of caution and apply a high bonding primer to ensure a successful paint job.
What paint finish is the best for bathroom cabinets?
When selecting a paint finish for your bathroom cabinets, it’s important to prioritize durability. The durability of a finish can range from worst to best based on its sheen level. Paint finishes with a higher gloss tend to be more durable than those with a flat sheen.
Therefore, when considering the best paint finish for bathroom cabinets, it is advisable to opt for a sheen that offers good durability. While different paint brands may use slightly different terminology, the basic hierarchy of sheens from most durable to least durable is as follows: High Gloss, Gloss, Semigloss, Satin, Eggshell, Matte, and Flat.
In the context of bathroom cabinets, which are often subjected to high traffic and frequent exposure to moisture and humidity, it is best to stick to the more durable sheen options. Personally, I would not recommend going below a satin finish, as it provides a good balance between durability and aesthetics. However, if you prioritize easy cleaning and a more wipeable surface, a semi-gloss finish would be an excellent choice. The semi-gloss finish is known for its ability to withstand frequent cleaning while maintaining its appearance.
That being said, if you are aiming for a high-end or modern look for your bathroom cabinets, a high gloss finish can create a stunning visual impact. It’s worth noting, however, that the glossier the finish, the more noticeable fingerprints and smudges can become. So, consider your priorities and the level of maintenance you are willing to commit to when making your final decision on the best paint finish for your bathroom cabinets.
Paint Color vs. The Type of Paint
When I shared a bit of this process on Instagram stories, I got a ton of questions asking about the paint color.
Home Improvement Tips
Painting Oak Kitchen Cabinets Pros and Cons
We know how much paint can instantly update a space, but what about oak kitchen cabinets? Here are the pros and cons, after having painted our cabinets a year ago.
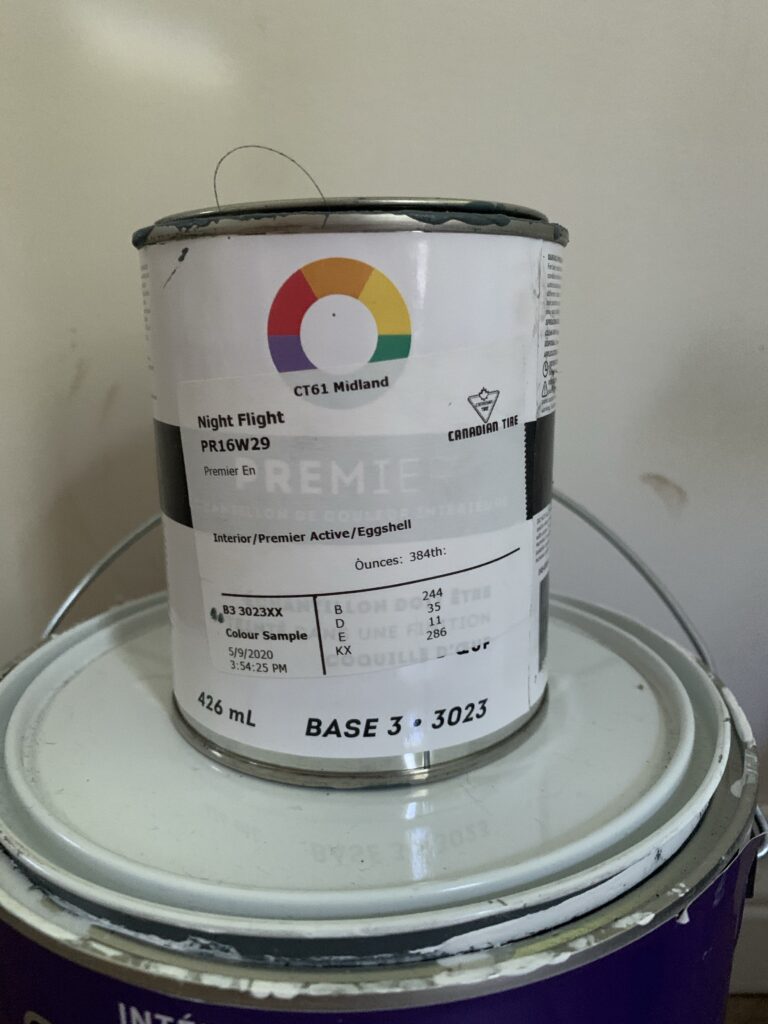
It’s called Night Flight by Premier Paint and we got it in Semi-Gloss.
However I would suggest sticking with a Behr Paint like this one specifically for painting cabinets or sticking to the same brand as the primer.
Below is a photo of the exact color I used if you want to get it matched.
Acylic vs Latex Paint
I was also asked if the topcoat is acrylic or latex paint.
I got the acrylic paint and primer because we’re able to cover the gloss on the oak cabinets.
However, If you have the option this paint is also a great option! Just a reminder you can shop all everything I mentioned in the “Shop the Post” section below.
Once you’re all done you can check out 7 easy bathroom updates you can do yourself when you can’t afford a remodel. It’s where I’ve compiled all our favorite DIYs and the ideas we used to makeover our bathroom. Plus you can see how our bathroom looks today, after all the easy updates we did.
Remember, while sanding is a recommended step for the best paint adherence, using the right primer can make a big difference when skipping the sanding step. Also, ensure the room is well-ventilated during the entire process, especially when using primers, paints, and cleaners.
In the meantime, don’t forget to pin this for later!


8 Comments